오랜만에 쓰는 튜토리얼
회사 업무 중 새로운 프로젝트에서 기존에 없던 소셜 로그인을 구현해 블로그에도 작성해보려 한다.
이전에 작성한 Spring Security 블로깅도 있으니 자세한 흐름 설명은 요기로..
[Spring] Spring Security + OAuth2.0으로 소셜 로그인 구현 ver 1. SSR (OAuth2.0 / 구글 로그인 / 네이버 로그인
2023.01.09 - [Backend/Spring] - [Spring] Spring Security 기본 개념 (JWT / OAuth2.0 / 동작 방식 / 구성 요소) [Spring] Spring Security 기본 개념 (JWT / OAuth2.0 / 동작 방식 / 구성 요소) JWT (Jason Web Token) 유저 인증, 식별하
datamoney.tistory.com
[Spring] Spring Security + OAuth2.0으로 소셜 로그인 구현 ver 2. SPA (OAuth2.0 / 구글 로그인 / 네이버 로그인
2023.01.20 - [Backend/Spring] - [Spring] Spring Security + OAuth2.0으로 소셜 로그인 구현 ver 1. SSR (OAuth2.0 / 구글 로그인 / 네이버 로그인 / 카카오 로그인 / 회원가입) [Spring] Spring Security + OAuth2.0으로 소셜 로그인
datamoney.tistory.com
이번에는 SSR 버전은 없다.
업무에서도 SPA 로 구현했고 jinja2를 안써봐서...
화면단은 그냥VSC 확장 프로그램인 Live Server로 간단하게 Html + JS 코드를 띄웠다.
소셜 로그인 애플리케이션 등록
소셜 로그인을 하려면 각 서비스마다 애플리케이션을 등록해야한다.
이전에 블로깅한게 있어 생략하겠다.
[Spring] Spring Security + OAuth2.0으로 소셜 로그인 구현 ver 1. SSR (OAuth2.0 / 구글 로그인 / 네이버 로그인
2023.01.09 - [Backend/Spring] - [Spring] Spring Security 기본 개념 (JWT / OAuth2.0 / 동작 방식 / 구성 요소) [Spring] Spring Security 기본 개념 (JWT / OAuth2.0 / 동작 방식 / 구성 요소) JWT (Jason Web Token) 유저 인증, 식별하
datamoney.tistory.com

여기서 제일 중요한건
⭐️ 응답받을 콜백 url 을 서비스 앱마다 추가해줘야한다 ⭐️
.env 파일에 환경변수추가
프론트
Html + JS에 큰 힘을 들이고 싶지 않아 최대한 간단히 작성했다.
로그인 버튼이 있는 login.html / 각 서비스에서 인증 후 결과를 콜백받을 서비스별 각 callback.html / 그리고 결과 값에 대해 뿌려줄 main.html 으로 구성되어 있다.
login.html
<!DOCTYPE html>
<html lang="en">
<head>
    <meta charset="UTF-8"/>
    <meta name="viewport" content="width=device-width, initial-scale=1.0"/>
    <title>Login Page</title>
    <style>
        body {
            font-family: Arial, sans-serif;
            background-color: #f5f5f5;
            display: flex;
            align-items: center;
            justify-content: center;
            height: 100vh;
            margin: 0;
        }

        .login-container {
            background-color: #fff;
            padding: 20px 30px;
            border-radius: 8px;
            box-shadow: 0 0 10px rgba(0, 0, 0, 0.1);
            text-align: center;
        }

        .login-btn img {
            width: 200px;
            height: auto;
        }

        .login-btn:hover img {
            opacity: 0.8;
        }
    </style>
</head>

<body>
  <div class="login-container">
      <h2>Login</h2>
      <a href="#" class="login-btn" id="google-login">
          <img src="https://developers.google.com/identity/images/btn_google_signin_dark_normal_web.png" alt="Google Login"/>
      </a>
      <br><br>
      <a href="" class="login-btn" id="kakao-login">
          <img src="kakao_login_btn.png" alt="Kakao Login"/>
      </a>
      <br><br>
      <a href="" class="login-btn" id="naver-login">
          <img src="naver_login_btn.png" alt="naver Login"/>
      </a>
  </div>

  <script>
    document.getElementById('google-login').addEventListener('click', function(event) {
        event.preventDefault();

        var clientId = '{구글클라이언트ID}';
        var redirectUri = 'http://127.0.0.1:5500/google/callback.html';
        var scope = 'https://www.googleapis.com/auth/userinfo.profile https://www.googleapis.com/auth/userinfo.email';


        // Google OAuth2 인증 서버로 리디렉션
        const authUrl = `https://accounts.google.com/o/oauth2/v2/auth?client_id=${clientId}&response_type=code&redirect_uri=${encodeURIComponent(redirectUri)}&scope=${encodeURIComponent(scope)}`;
        window.location.href = authUrl;
    });
    document.getElementById('kakao-login').addEventListener('click', function(event) {
        event.preventDefault();

        var clientId = '{카카오클라이언트ID}'
        var redirectUri = 'http://127.0.0.1:5500/kakao/callback.html'

        // Kakao OAuth2 인증 서버로 리디렉션
        const authUrl = `https://kauth.kakao.com/oauth/authorize?client_id=${clientId}&response_type=code&redirect_uri=${encodeURIComponent(redirectUri)}`;
        window.location.href = authUrl;
    });
    document.getElementById('naver-login').addEventListener('click', function(event) {
        event.preventDefault();

        var clientId = '{네이버클라이언트ID}';
        var redirectUri = 'http://127.0.0.1:5500/naver/callback.html'

        // Naver OAuth2 인증 서버로 리디렉션
        const authUrl = `https://nid.naver.com/oauth2.0/authorize?client_id=${clientId}&response_type=code&redirect_uri=${encodeURIComponent(redirectUri)}&state=test111state`;
        window.location.href = authUrl;
    });
  </script>
</body>
</html>
각 버튼마다 인증서버로 요청이 간다.
여기서 본인의 각 서비스마다의 클라이언트 ID와 미리 설정해둔 콜백 url 이 필요하다
callback.html
<!DOCTYPE html>
<html lang="en">
<head>
    <meta charset="UTF-8"/>
    <meta name="viewport" content="width=device-width, initial-scale=1.0"/>
    <title>Naver OAuth Callback</title>
</head>
<body>
    <h2>Processing Naver OAuth...</h2>

    <script>
        window.onload = function() {
            // URL에서 code, state, error, error_description 파라미터 추출
            const urlParams = new URLSearchParams(window.location.search);
            const code = urlParams.get('code');
            const state = urlParams.get('state');
            const error = urlParams.get('error');
            const errorDescription = urlParams.get('error_description');


        if (code) {
            // 성공적으로 code를 추출한 경우, 서버로 전송
            fetch('http://127.0.0.1:8000/oauth/naver', {
                method: 'POST',
                headers: {
                    'Content-Type': 'application/json',
                },
                body: JSON.stringify({ code: code })
            })
            .then(response => {
                if (!response.ok) {
                    throw new Error('Network response was not ok');
                }
                return response.json();
            })
            .then(data => {
                console.log('Success:', data);
                // 응답이 200인 경우 처리
                if (data.message === 'oauth login successful' || data.message === 'oauth register successful') {
                    const userName = encodeURIComponent(data.name);  // 사용자 이름을 URL에 맞게 인코딩
                    window.location.href = `http://127.0.0.1:5500/main.html?name=${userName}`;
                } else {
                    // 실패 시 오류 처리
                    throw new Error('Unexpected response message');
                }
            })
            .catch((error) => {
                console.error('Error:', error);
                // 실패 시에도 main.html로 이동
                window.location.href = `http://127.0.0.1:5500/main.html?error=${encodeURIComponent(error.message)}`;
            });
        } else if (error) {
            // error 파라미터가 있는 경우, 에러 처리
            console.error(`Error: ${error}, Description: ${errorDescription}`);
            window.location.href = `http://127.0.0.1:5500/main.html?error=${encodeURIComponent(error)}&error_description=${encodeURIComponent(errorDescription)}`;
        } else {
            // code와 error가 모두 없는 경우, 기본 리디렉션
            console.error('No code or error found in URL');
            window.location.href = 'http://127.0.0.1:5500/main.html';
        }
    };
    </script>
</body>
</html>
위에서 설정한 콜백 url에 해당하는 코드이다.
각 google / kakao / naver 인증 서버에서 로그인 시도 후 해당 페이지로 들어오게 되는데
여기서 성공이라면 (= code가 있다면) 백엔드로 후처리를 하기 위해 해당 코드와 함께 보낸다.
main.html
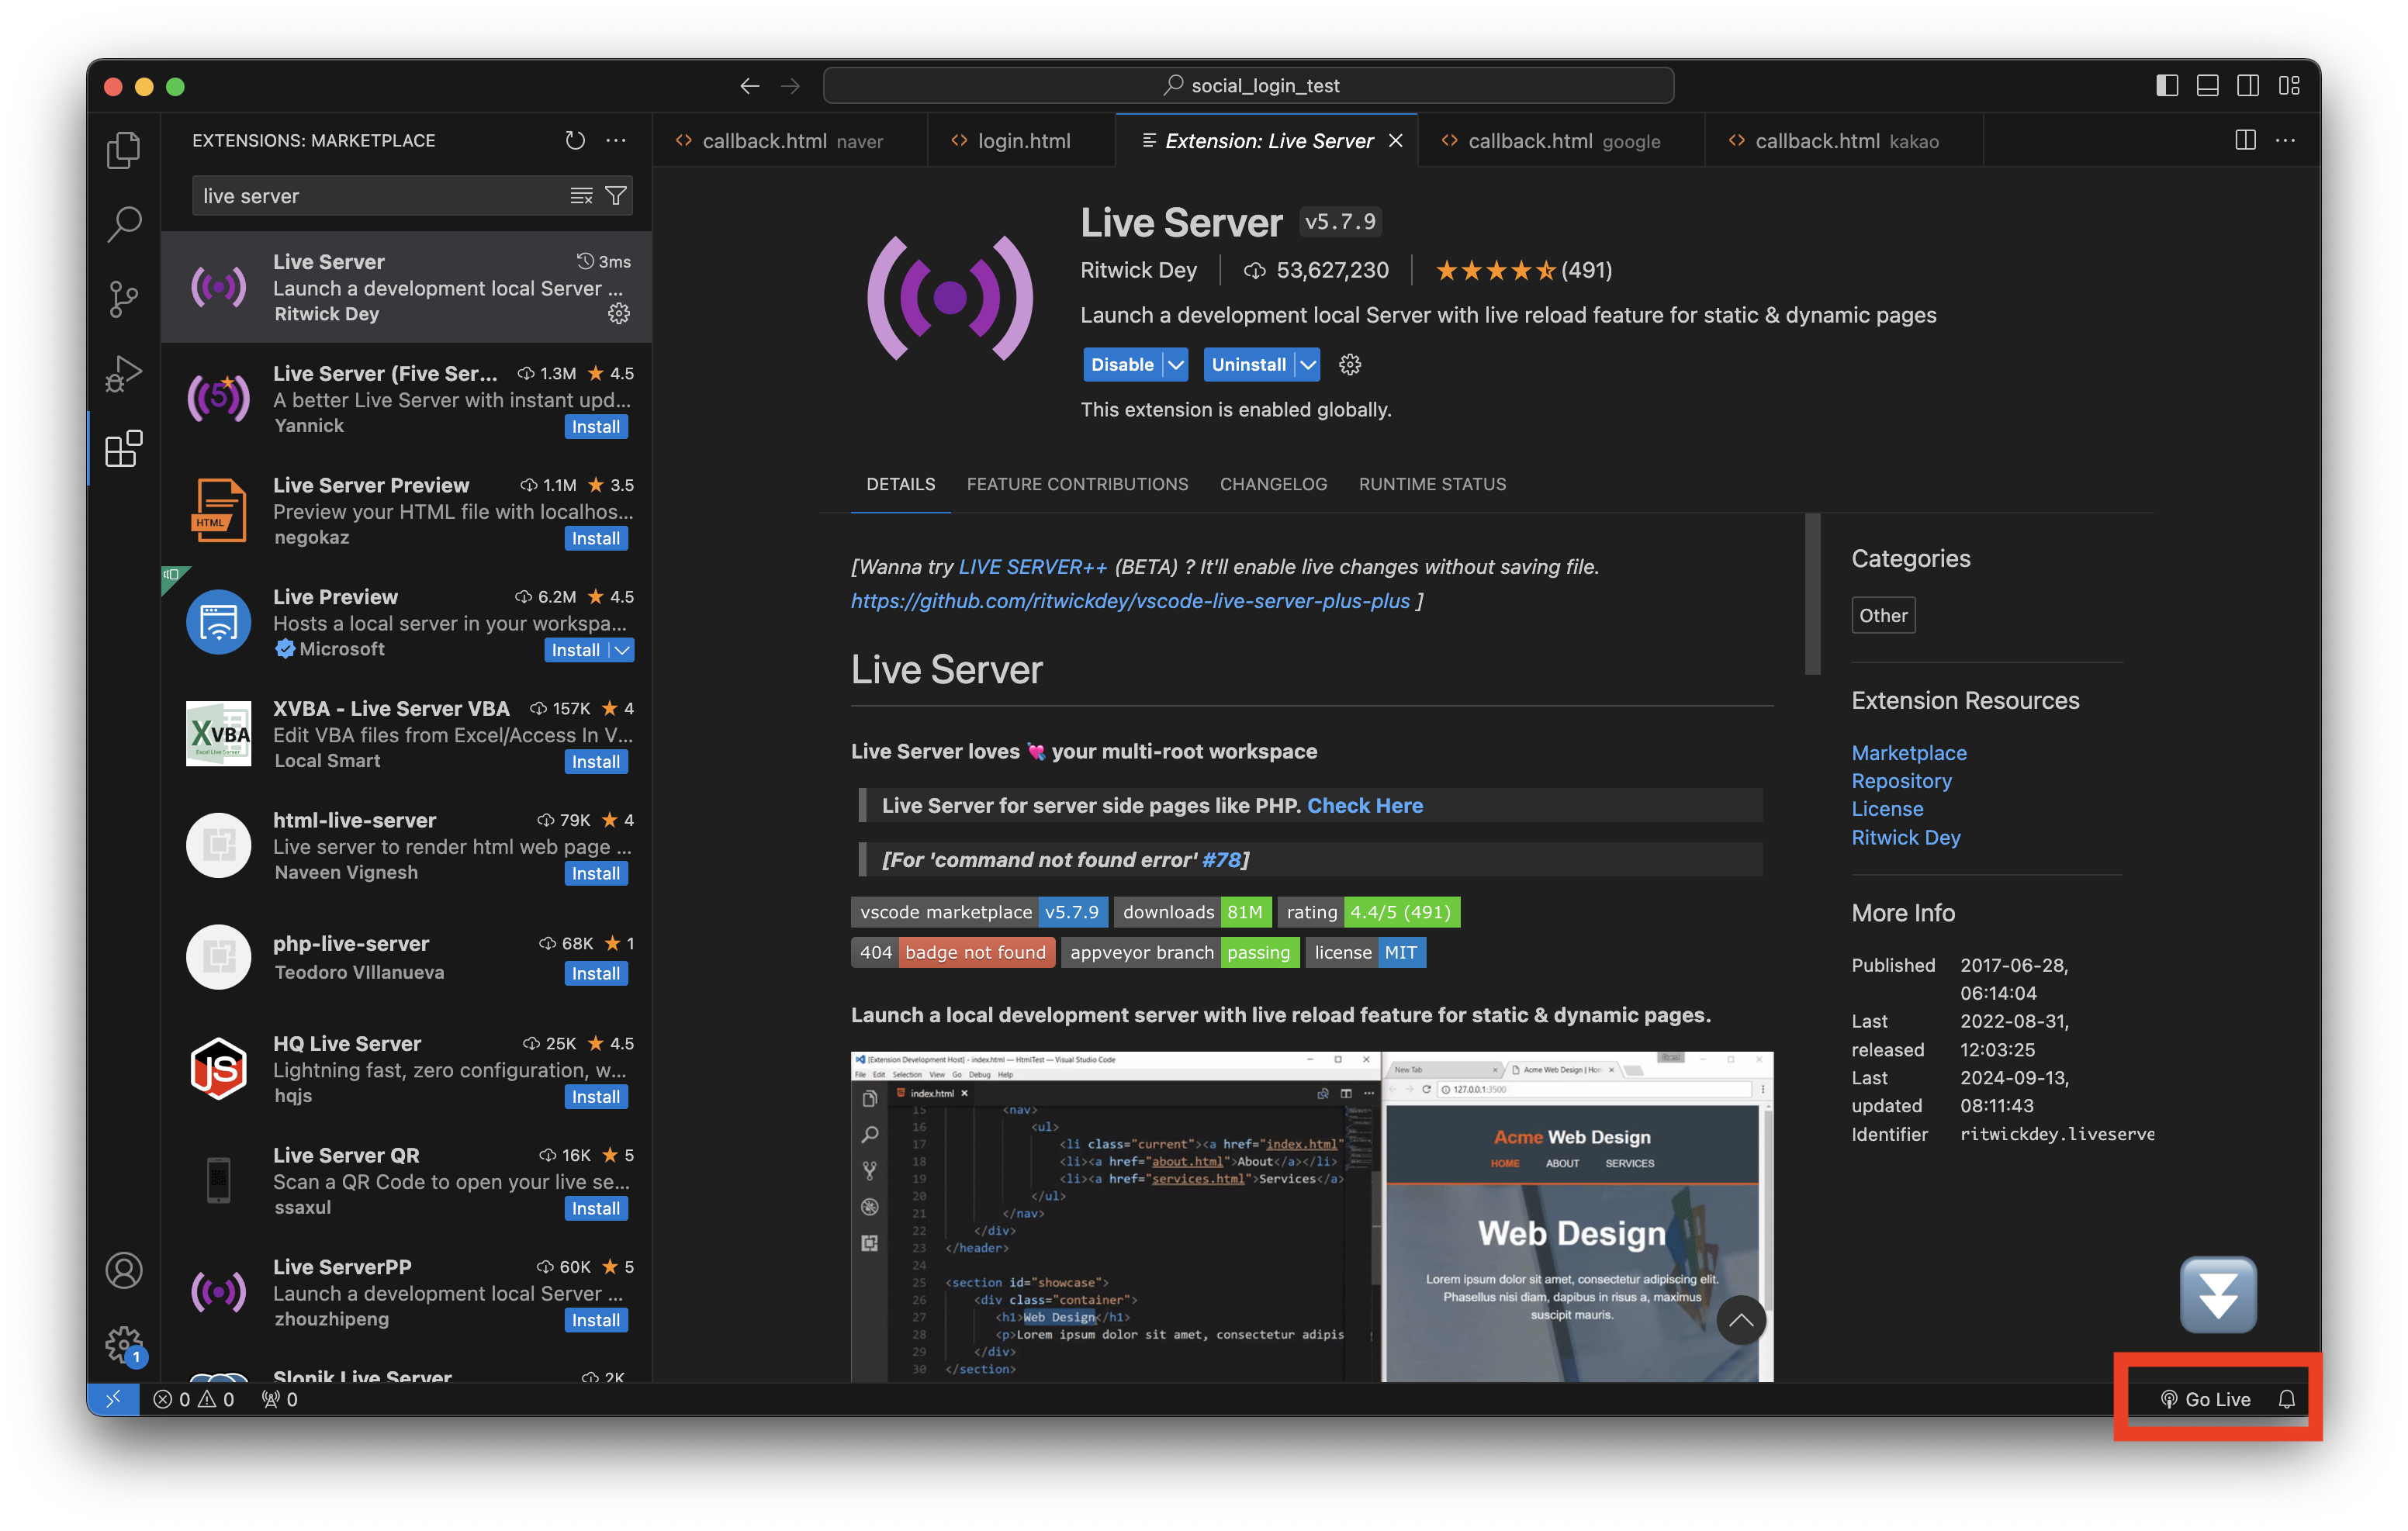
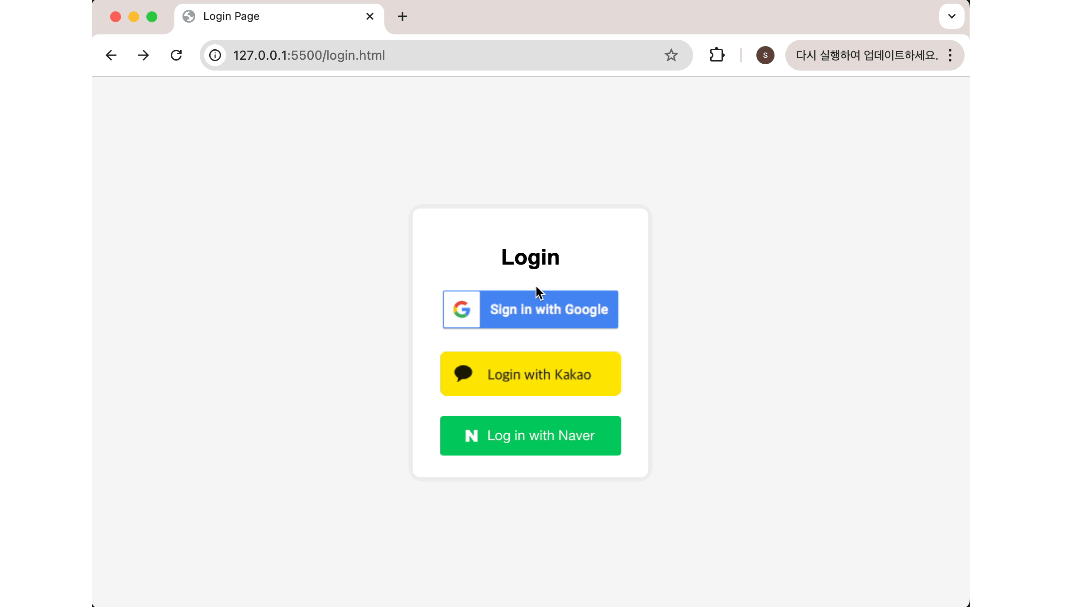
live server 을 통해 쉽게 화면을 띄울 수 있다.
login.html 화면을 확인할 수 있다.

백엔드 (FastAPI)
FastAPI 애플리케이션을 준비한다.
프로젝트 셋팅부터 필요하다면 아래를 참고하세요
2023.07.11 - [Python/FastAPI] - [FastAPI ①]게시판 CRUD API 구현 실습 (SQLAlchemy / Rest API / 예외 처리)
[FastAPI ①]게시판 CRUD API 구현 실습 (SQLAlchemy / Rest API / 예외 처리)
FastAPI 기본 게시판 CRUD API 실습 오랜만에 기본 게시판 CRUD API 실습 블로깅을 해본다. 이번에는 Python으로 진행한다. 업무로 FastAPI를 접하고 생각보다 너무 재밌어 다음에는 Django를 공부하고 싶어
datamoney.tistory.com
기본인 router 파일을 만들어줬다.
main.py에 등록해준다.
main.py
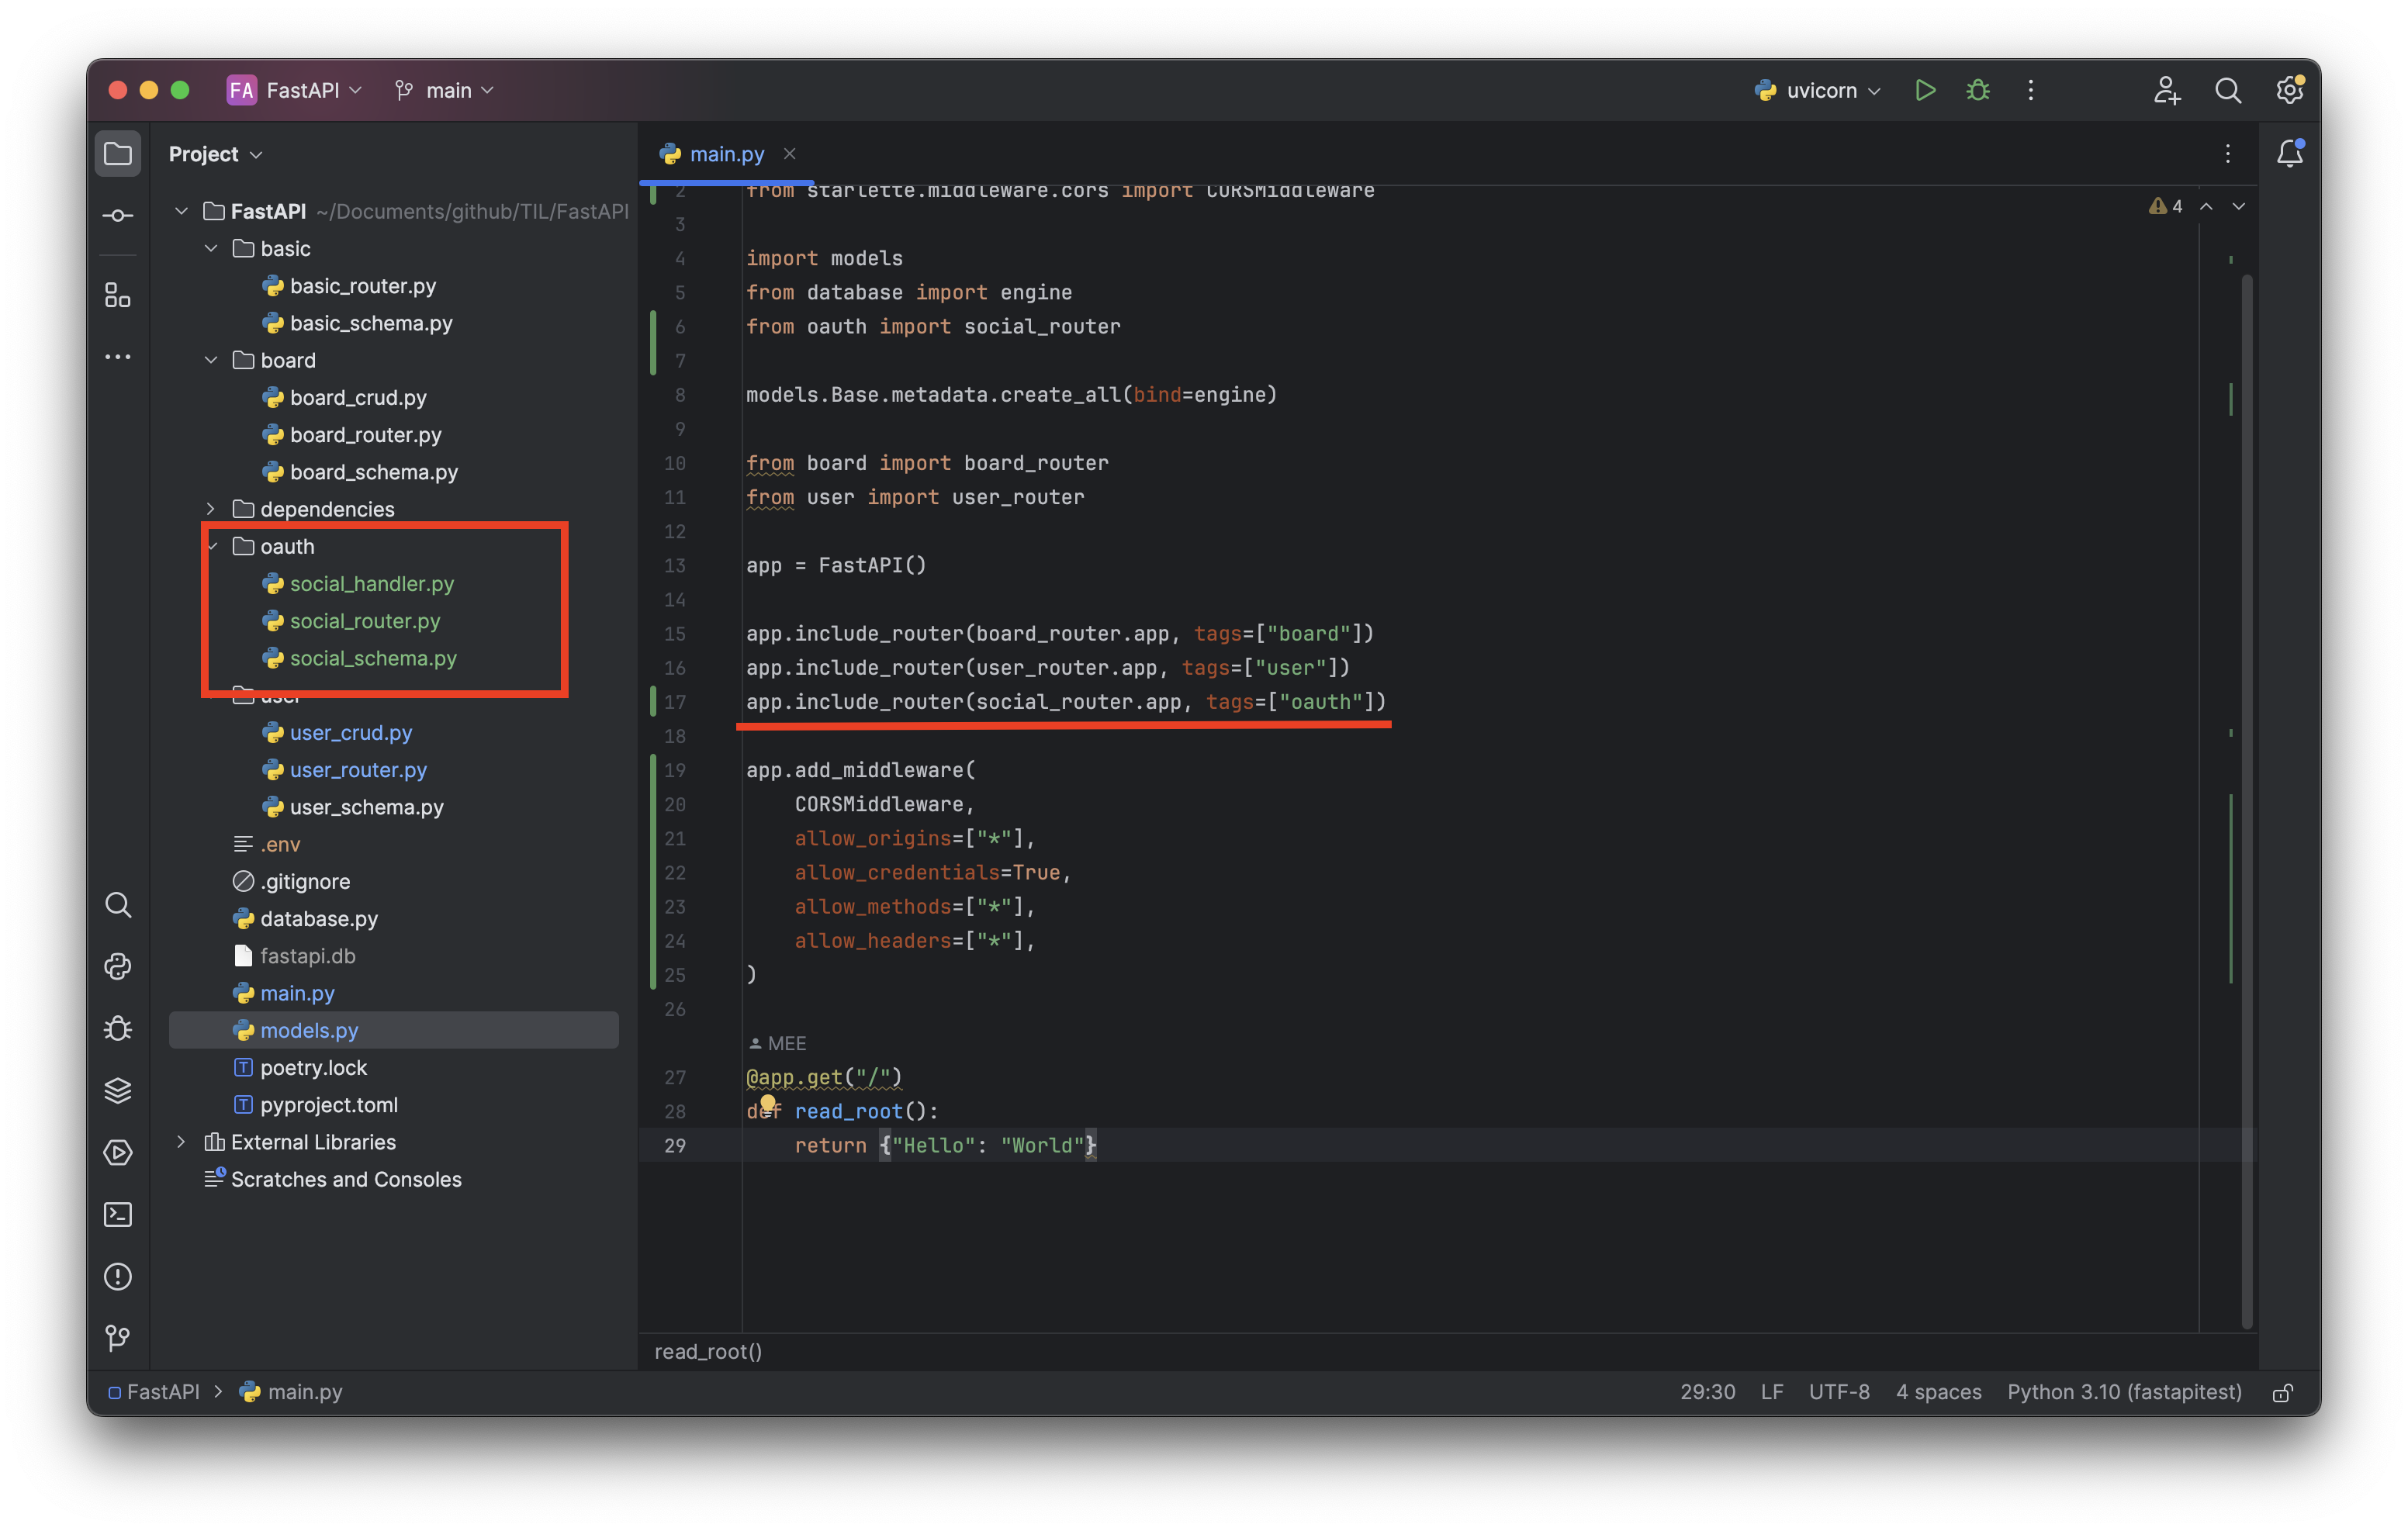
그리고 프론트(5500)와 백엔드(8000)의 포트가 다르기에 CORS 오류가 발생한다.
CORSMiddleware와 allow_origins / allow_credentials 등의 설정을 해준다.
가져온 값을 Users 테이블에 저장하기 위해 기존 Users 모델을 수정해줬다.
models.py
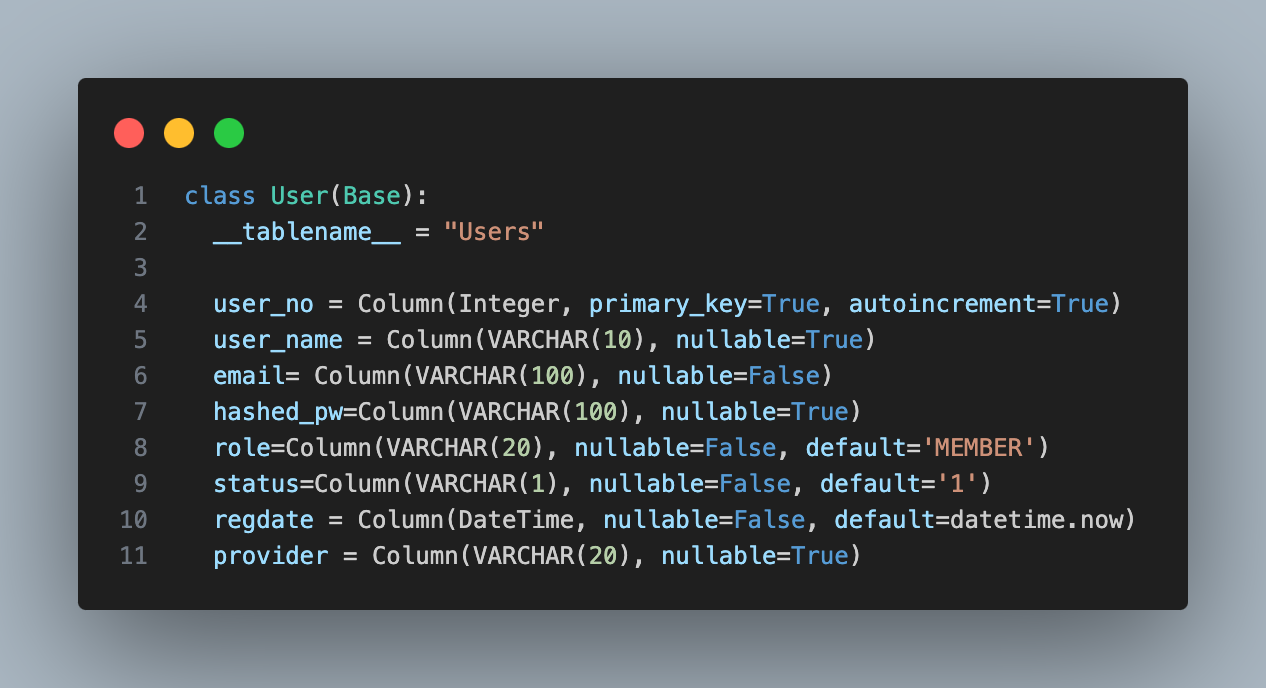
class User(Base):
  __tablename__ = "Users"

  user_no = Column(Integer, primary_key=True, autoincrement=True)
  user_name = Column(VARCHAR(10), nullable=True)
  email= Column(VARCHAR(100), nullable=False)
  hashed_pw=Column(VARCHAR(100), nullable=True)
  role=Column(VARCHAR(20), nullable=False, default='MEMBER')
  status=Column(VARCHAR(1), nullable=False, default='1')
  regdate = Column(DateTime, nullable=False, default=datetime.now)
  provider = Column(VARCHAR(20), nullable=True)
social_router.py
from fastapi import APIRouter, HTTPException, Depends
from sqlalchemy.orm import Session
from starlette import status
from starlette.responses import JSONResponse

from database import get_db
from oauth import social_handler
from oauth.social_schema import SocialLogin, PROVIDER_ENUM
from user import user_crud

app = APIRouter(
    prefix="/oauth",
)

@app.post(path="/{provider}", description="소셜 로그인 / 회원가입")
async def social_auth(provider: str, form: SocialLogin, db: Session = Depends(get_db)):

    # provider에 따라 분기처리
    provider = PROVIDER_ENUM.from_str(provider.lower())
    if not provider:
        raise HTTPException(status_code=404)

    try:
        if provider == PROVIDER_ENUM.GOOGLE:
            user_data = social_handler.auth_google(form.code)
        elif provider == PROVIDER_ENUM.KAKAO:
            user_data = social_handler.auth_kakao(form.code)
        else:
            user_data = social_handler.auth_naver(form.code)

        user = user_crud.get_user(db, user_data.email, provider=user_data.provider)

        # 존재하는 회원시 로그인처리
        if user and user.status != '9':
            response_body = {"message": "oauth login successful", "name": user_data.name}
            return JSONResponse(status_code=status.HTTP_200_OK, content=response_body)
        else:
            # 존재하지 않는 회원시 회원가입처리
            user_crud.create_social_user(user_data, db)
            response_body = {"message": "oauth register successful", "name": user_data.name}
            return JSONResponse(status_code=status.HTTP_200_OK, content=response_body)

    except Exception as e:
        raise HTTPException(status_code=status.HTTP_400_BAD_REQUEST, detail=str(e))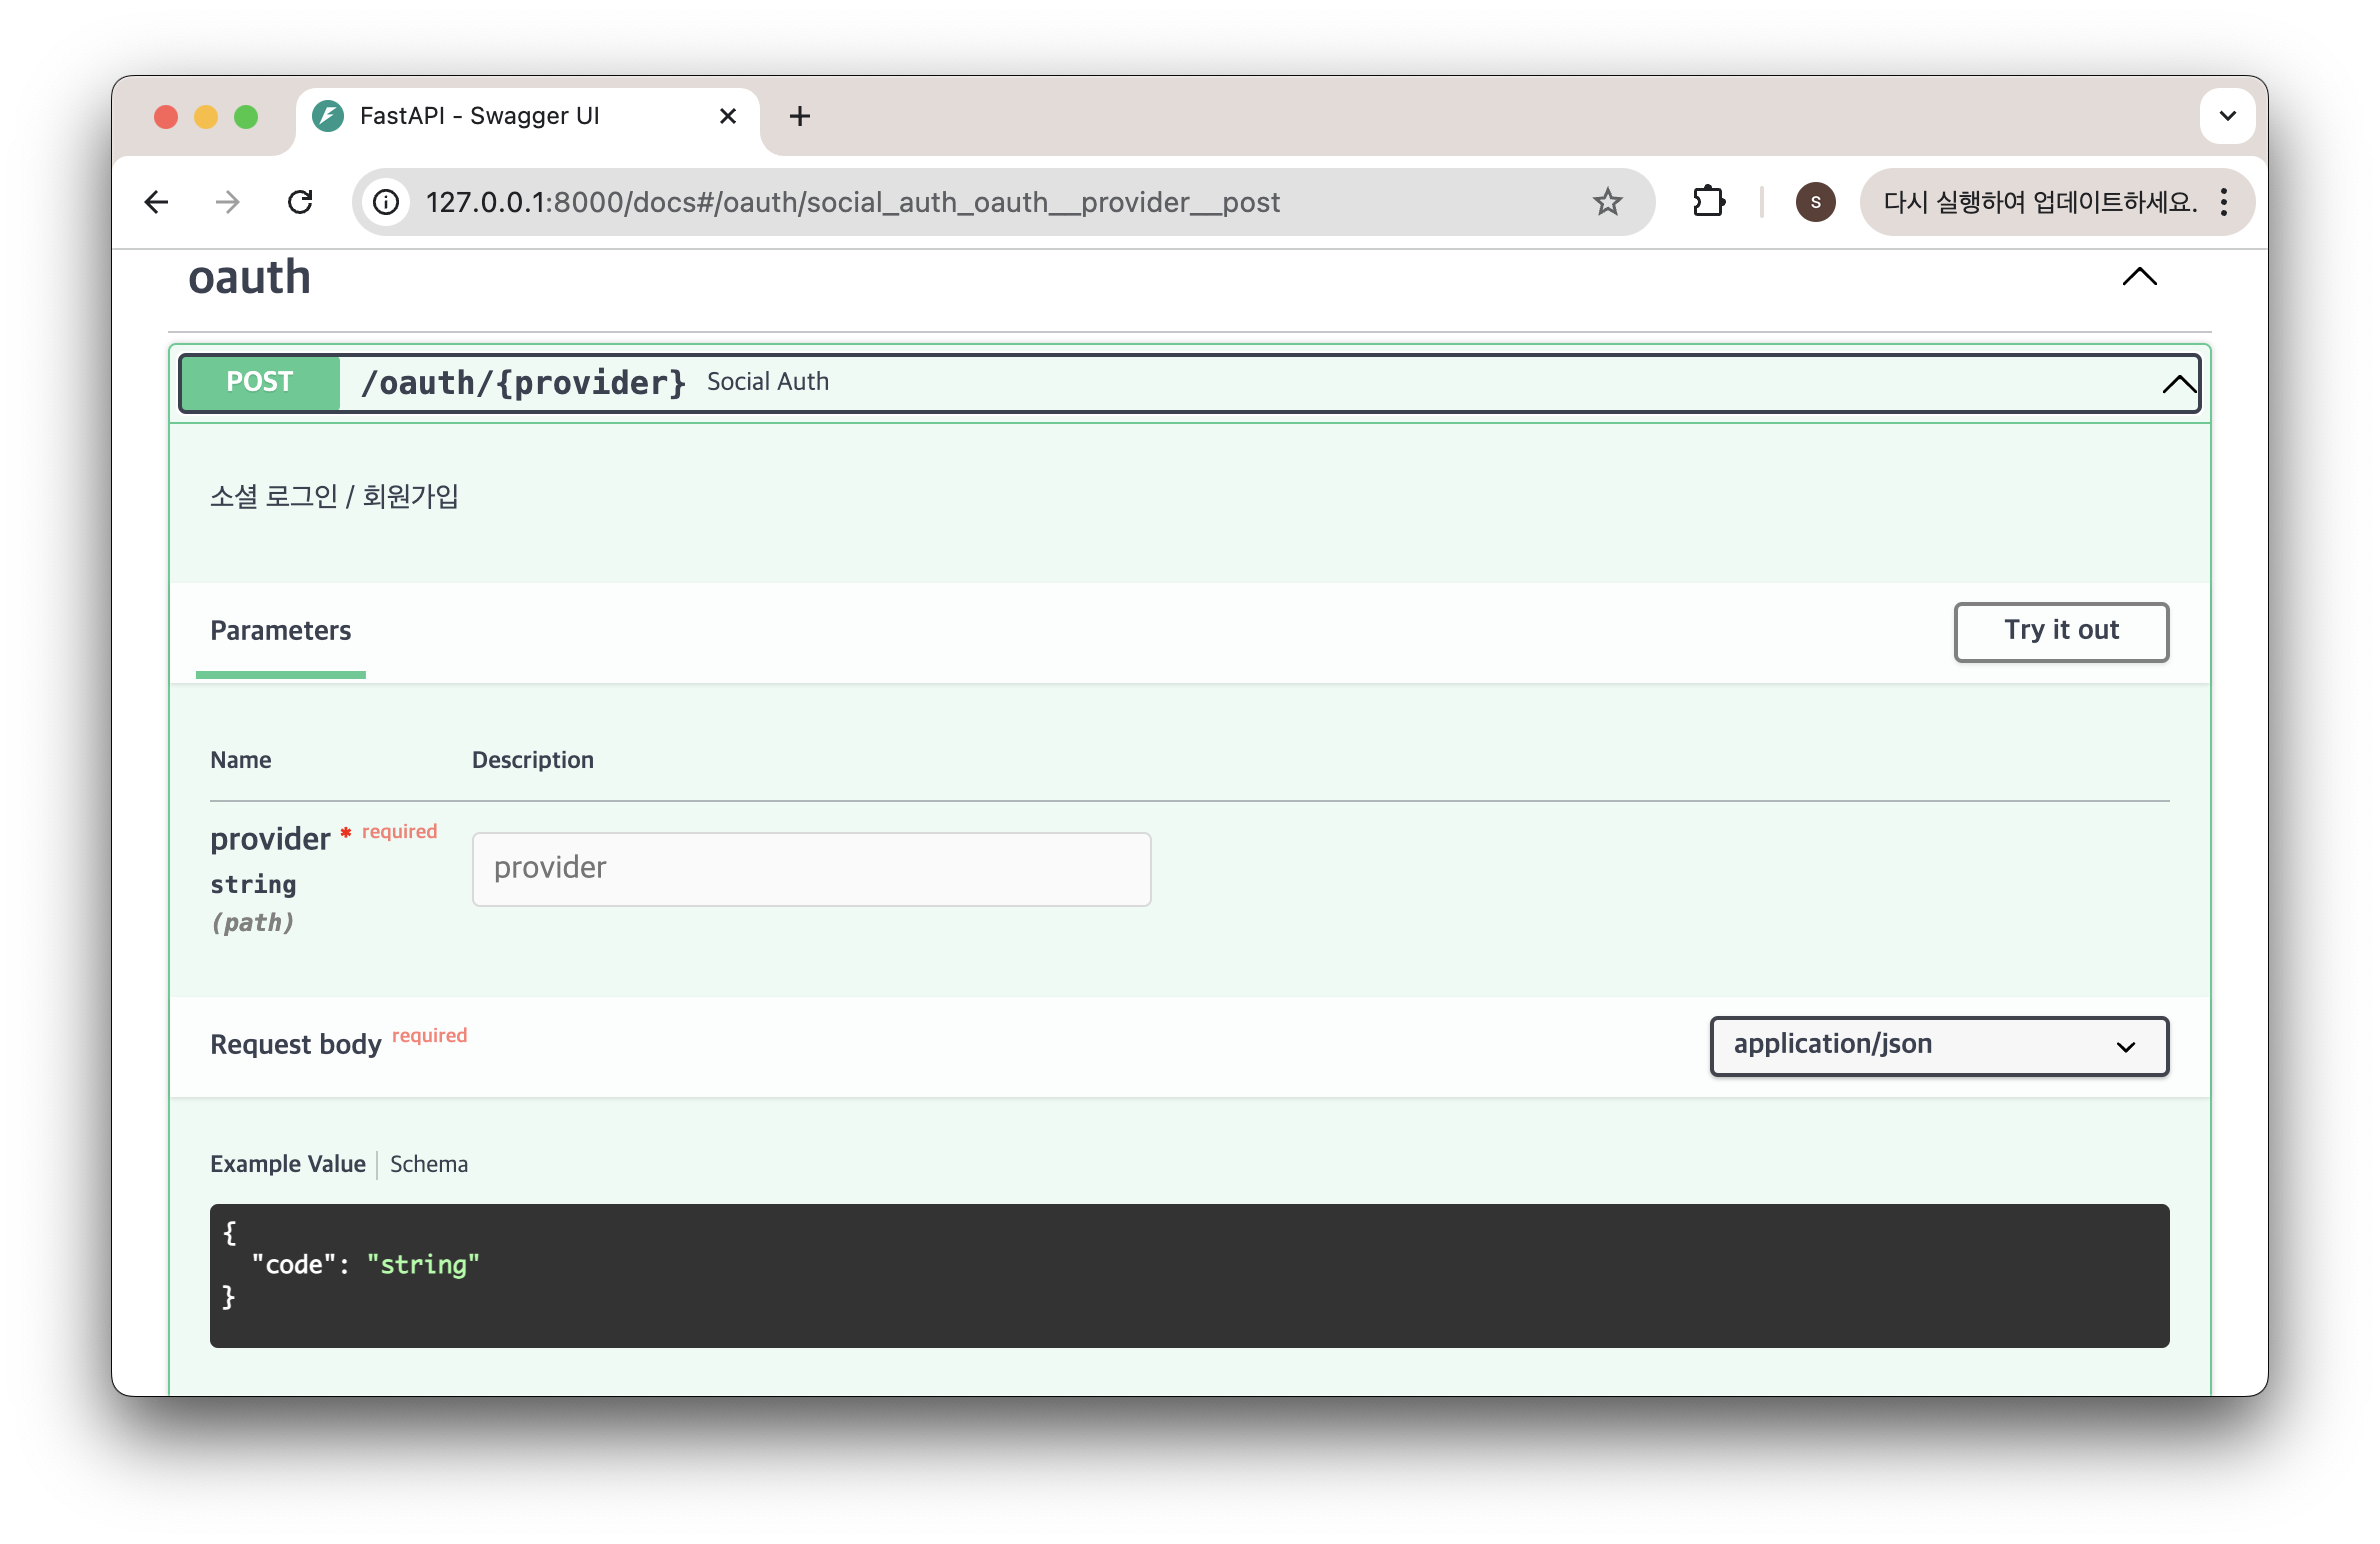
endpoint를 provider에 따라 분기처리해 social_handler.py 로 처리해줬다.
handler에 따라 각 서비스에서 사용자 정보를 가져와
해당 사용자의 정보가 있는지 없는지를 확인해
있다면 로그인처리 / 없다면 회원가입처리를 해준다.
social_handler.py
import os

import requests

from oauth.social_schema import SocialMember, PROVIDER_ENUM

GOOGLE_CLIENT_ID = os.getenv("GOOGLE_CLIENT_ID")
GOOGLE_CLIENT_SECRET = os.getenv("GOOGLE_SECRET")
GOOGLE_CALLBACK_URI = "http://127.0.0.1:5500/google/callback.html"

KAKAO_CLIENT_ID = os.getenv("KAKAO_CLIENT_ID")
KAKAO_SECRET = os.getenv("KAKAO_SECRET")
KAKAO_CALLBACK_URI = "http://127.0.0.1:5500/kakao/callback.html"

NAVER_CLIENT_ID = os.getenv("NAVER_CLIENT_ID")
NAVER_SECRET = os.getenv("NAVER_SECRET")
STATE = os.getenv("NAVER_STATE")


def auth_google(code: str):
    try:
        # google에 access token 요청
        token_url = f"https://oauth2.googleapis.com/token?client_id={GOOGLE_CLIENT_ID}&client_secret={GOOGLE_CLIENT_SECRET}&code={code}&grant_type=authorization_code&redirect_uri={GOOGLE_CALLBACK_URI}"
        token_response = requests.post(token_url)
        if token_response.status_code != 200:
            raise Exception

        # google에 회원 정보 요청
        access_token = token_response.json()['access_token']
        user_info = f"https://www.googleapis.com/oauth2/v1/userinfo?access_token={access_token}"
        user_response = requests.get(user_info)
        if user_response.status_code != 200:
            raise Exception
    except:
        raise Exception("google oauth error")

    info = user_response.json()
    return SocialMember(
        name=info.get('name'),
        email=info.get('email'),
        provider=PROVIDER_ENUM.GOOGLE.name
    )


def auth_kakao(code: str):
    try:
        # kakao에 access token 요청
        token_url = f"https://kauth.kakao.com/oauth/token?client_id={KAKAO_CLIENT_ID}&client_secret={KAKAO_SECRET}&code={code}&grant_type=authorization_code&redirect_uri={KAKAO_CALLBACK_URI}"
        headers = {"Content-type": "application/x-www-form-urlencoded;charset=utf-8"}
        token_response = requests.post(token_url, headers=headers)
        if token_response.status_code != 200:
            raise Exception

        # kakao에 회원 정보 요청
        access_token = token_response.json()['access_token']
        user_info = f"https://kapi.kakao.com/v2/user/me"
        headers = {"Authorization": "Bearer " + access_token,
                   "Content-type": "application/x-www-form-urlencoded;charset=utf-8"}
        user_response = requests.post(user_info, headers=headers)
        if user_response.status_code != 200:
            raise Exception
    except:
        raise Exception("kakao oauth error")

    info = user_response.json()['kakao_account']
    name = info.get('name') if info.get('name') else info.get('profile').get('nickname')
    return SocialMember(
        name=name,
        email=info.get('email'),
        provider=PROVIDER_ENUM.KAKAO.name
    )

def auth_naver(code: str):
    try:
        # naver에 access token 요청
        token_url = f"https://nid.naver.com/oauth2.0/token?client_id={NAVER_CLIENT_ID}&client_secret={NAVER_SECRET}&code={code}&grant_type=authorization_code&state={STATE}"
        token_response = requests.post(token_url)
        if token_response.status_code != 200:
            raise Exception

        # naver에 회원 정보 요청
        access_token = token_response.json()['access_token']
        user_info = f"https://openapi.naver.com/v1/nid/me"
        headers = { "Authorization": "Bearer "+access_token }
        user_response = requests.post(user_info, headers=headers)
        if user_response.status_code != 200:
            raise Exception
    except:
        raise Exception("naver oauth error")

    info = user_response.json()['response']
    return SocialMember(
        name=info.get('name'),
        email=info.get('email'),
        provider=PROVIDER_ENUM.NAVER.name
    )
기본적인 로직의 골자는 같다
들어온 code로 access_token 을 부여받기
access_token 으로 사용자 정보를 가져오기
로 진행된다.
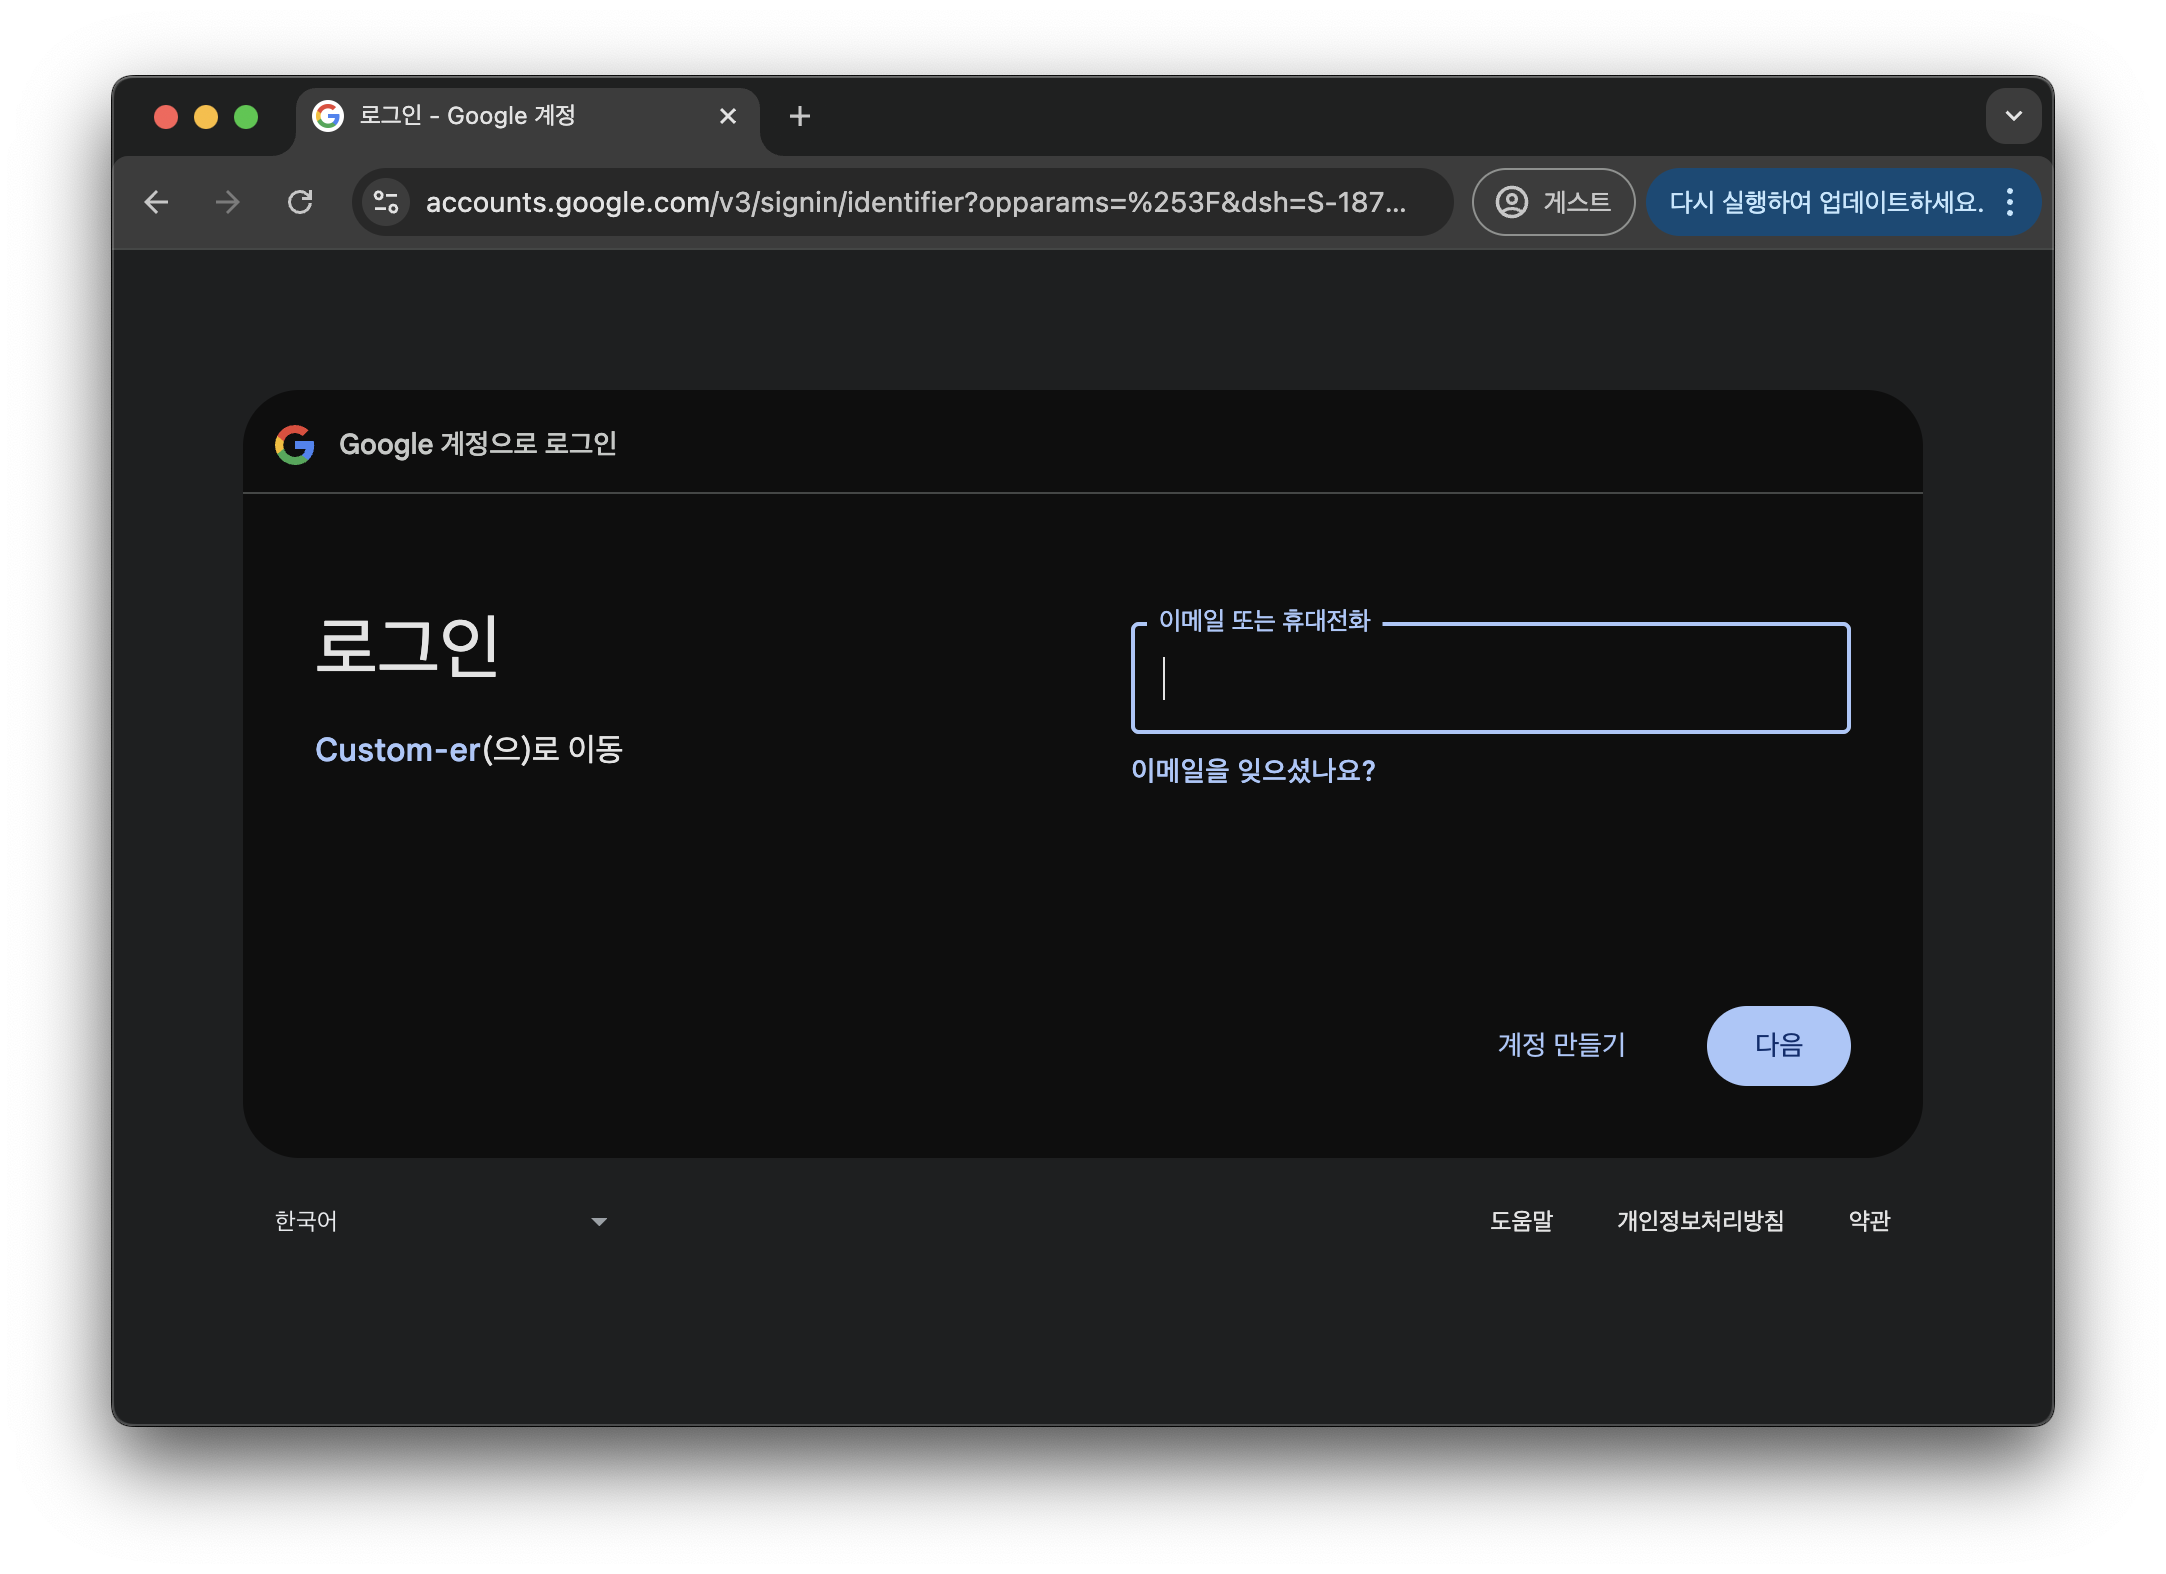
이대로 서버를 실행해 로그인해보면 이렇게 진행되는 걸 볼 수 있다.
login => callback => 로그인 성공/실패 확인
이미 로그인 되어 있는 크롬창이라 로그인 화면없이 그대로 넘어가졌는데
로그인되어 있지 않다면 아래처럼 로그인하는 창이 뜰 것이다.
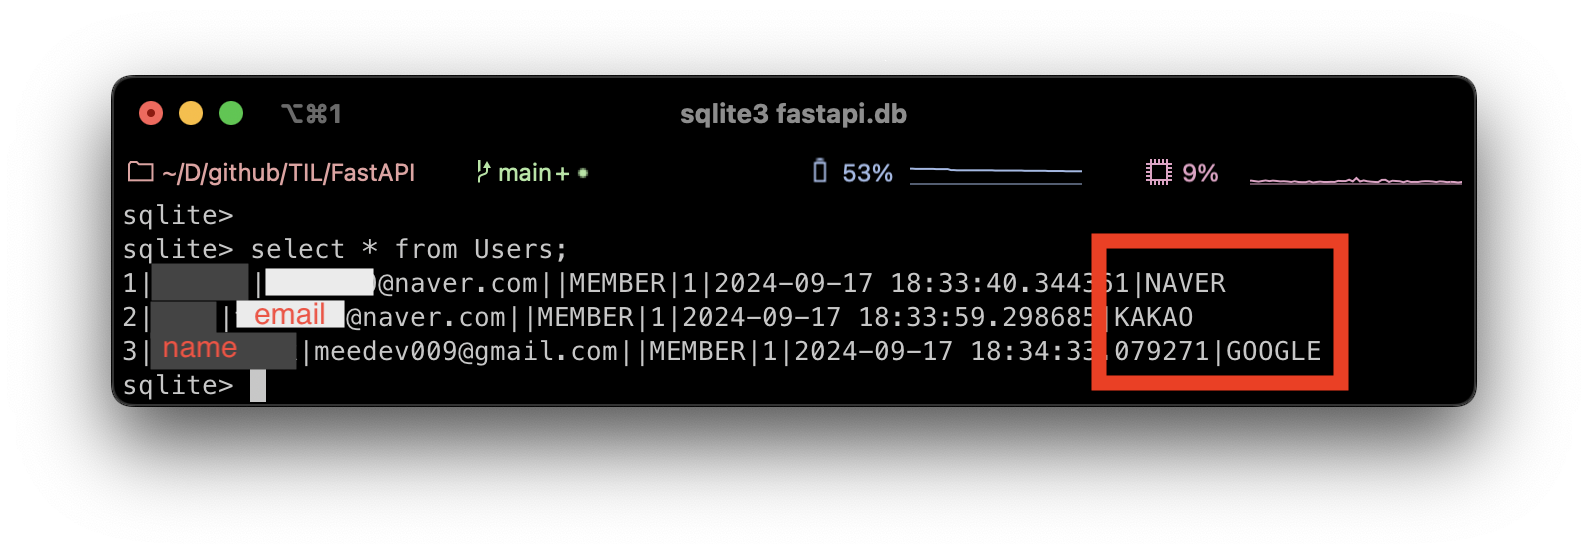
실제로 DB에도 잘 들어가졌는지 확인해봤는데 잘 들어갔다 👏
장고로 했을때는 진짜 힘들었는데 역시 Fastapi가 쉽다...👍
장고 튜토리얼도 곧 올려야지
코드
https://github.com/recordbuffer/TIL/tree/main/FastAPI
TIL/FastAPI at main · recordbuffer/TIL
Today I Learned. Contribute to recordbuffer/TIL development by creating an account on GitHub.
github.com
'Python > FastAPI' 카테고리의 다른 글
| [FastAPI ③] JWT 로그인 구현 실습 (Rest API / Bearer with JWT tokens / 쿠키에 토큰 저장) (2) | 2023.09.13 |
|---|---|
| [FastAPI ②] 일반 회원가입, 로그인 구현 실습 (Rest API / 회원 가입 유효성 검증) (0) | 2023.08.17 |
| [FastAPI ①]게시판 CRUD API 구현 실습 (SQLAlchemy / Rest API / 예외 처리) (2) | 2023.07.28 |
| [FastAPI] 파이썬 경량 프레임워크 (기본 개념 / 입문 / 개발 환경 구성) (0) | 2023.06.06 |


댓글