객체를 새로 생성해 DB에 저장할때 객체가 생성된 생성일시나
객체가 수정된 수정일시를 같이 넣어주는 경우가 왕왕 있다.
이럴때 LocalDate.now( ) 로 넣곤했는데
그럴 필요 없이 자동으로 생성해서 넣어주는 방법이 있다.
간단한 코드로 비교해보자
강의 엔티티를 하나 만들었다.
Course
|
1
2
3
4
5
6
7
8
9
10
11
12
13
14
15
16
17
18
19
20
21
22
23
24
25
26
27
28
29
30
31
32
33
34
35
36
37
38
39
40
|
import javax.persistence.Entity;
import javax.persistence.EntityListeners;
import javax.persistence.GeneratedValue;
import javax.persistence.Id;
import java.sql.Timestamp;
@Getter
@Setter
@NoArgsConstructor
@AllArgsConstructor
@EntityListeners(AuditingEntityListener.class)
@Entity
public class Course {
@Id
@GeneratedValue
private Long id;
private String name;
private String author;
@CreatedDate
private Timestamp createdDate;
@LastModifiedDate
private Timestamp modifiedDate;
@CreationTimestamp
private Timestamp creationTimestamp;
@UpdateTimestamp
private Timestamp updateTimestamp;
public Course(String name, String author) {
this.name = name;
this.author =author;
}
}
|
cs |
간단히 이름, 저자명을 가지고 생성일자, 수정일자를 가지는 강의 엔티티이다.
여기서 @CreatedDate와 @LastModifiedDate는 springframework.data.annotation 패키지에서 import 해줬고
@CreationTimestamp와 @UpdateTimestamp는 hibernate.annotation 패키지에서 import 해줬다.
CourseRepository
|
1
2
3
4
5
6
7
8
9
10
11
12
13
14
15
16
17
18
19
20
21
22
23
24
25
26
27
|
import com.udemy.jpa_study.indepth.domain.Course;
import org.slf4j.Logger;
import org.slf4j.LoggerFactory;
import org.springframework.beans.factory.annotation.Autowired;
import org.springframework.stereotype.Repository;
import org.springframework.transaction.annotation.Transactional;
import javax.persistence.EntityManager;
@Repository
@Transactional
public class CourseRepository {
private Logger logger = LoggerFactory.getLogger(this.getClass());
public void createEntityDateTime() {
Course course1 = new Course("EntityManager 111", "em");
em.persist(course1);
}
public void updateEntityDateTime() {
Course course1 = em.find(Course.class, 1L);
course1.setName("EntityManager 111 - updated");
em.flush();
}
}
|
cs |
엔터티를 생성하는 메소드와 update하는 메소드를 만들어줬다.
CourseApplication
|
1
2
3
4
5
6
7
8
9
10
11
12
13
14
15
16
17
18
19
20
21
22
23
24
25
26
27
|
import com.udemy.jpa_study.indepth.repository.CourseRepository;
import org.slf4j.Logger;
import org.slf4j.LoggerFactory;
import org.springframework.beans.factory.annotation.Autowired;
import org.springframework.boot.CommandLineRunner;
import org.springframework.boot.SpringApplication;
import org.springframework.boot.autoconfigure.SpringBootApplication;
import org.springframework.data.jpa.repository.config.EnableJpaAuditing;
@EnableJpaAuditing
@SpringBootApplication
public class CourseApplication implements CommandLineRunner {
private Logger logger = LoggerFactory.getLogger(this.getClass());
@Autowired
CourseRepository repository;
public static void main(String[] args) {
SpringApplication.run(CourseApplication.class, args);
}
@Override
public void run(String... args) throws Exception {
repository.createEntityDateTime();
}
}
|
cs |
서버가 실행되자마자 위에서 만든 엔티티 생성 메소드를 실행해준다.
CourseController
|
1
2
3
4
5
6
7
8
9
10
11
12
13
14
15
16
17
|
import com.udemy.jpa_study.indepth.repository.CourseRepository;
import org.springframework.beans.factory.annotation.Autowired;
import org.springframework.web.bind.annotation.GetMapping;
import org.springframework.web.bind.annotation.RestController;
@RestController
public class CourseController {
@Autowired
CourseRepository repository;
@GetMapping("/update/dateTime")
public void updateEntity() {
repository.updateEntityDateTime();
}
}
|
cs |
시간 차를 두고 update 해주기 위해 controller를 만들어 요청이 들어오면 update 해주도록 했다.


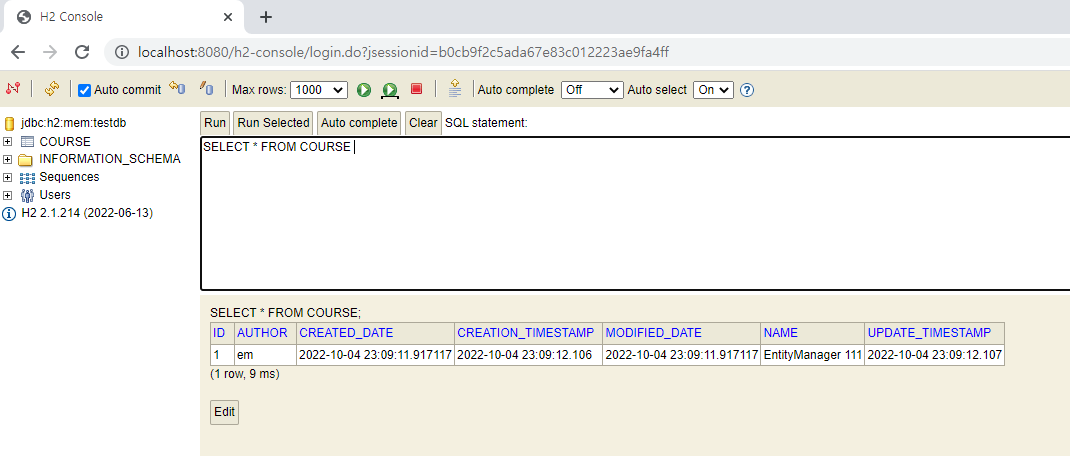
서버를 시작하고 h2를 보면 엔티티 생성이 잘 되어
생성일자가 모두 잘 들어간걸 볼 수 있다.
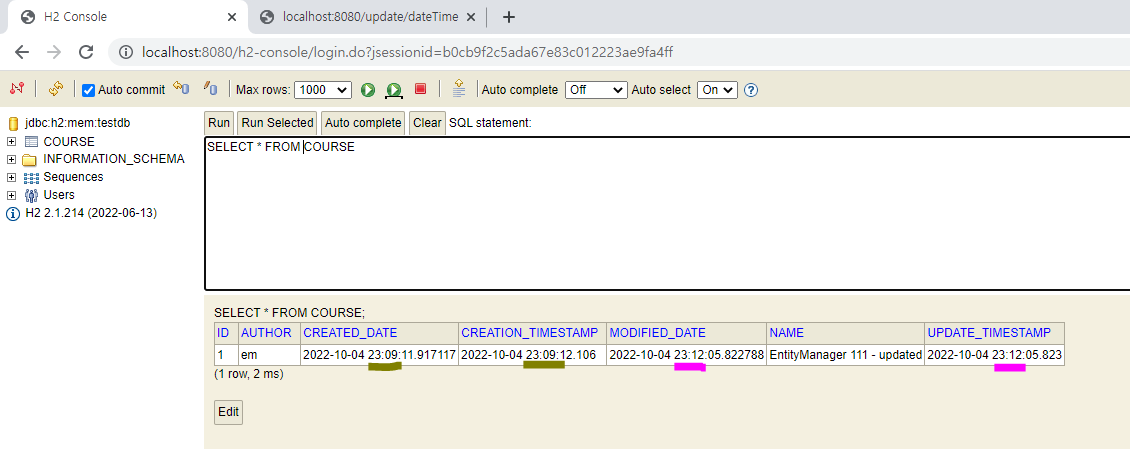
시간차를 두고 요청을 보냈다.
🎇 http://localhost:8080/update/dateTime


update도 잘 되어 시간이 알아서 수정일자에 들어간걸 볼 수 있다.
11시 9분에서 12분으로 변경되었다.
여기서 이 두가지 어노테이션의 차이를 정리해보자면 이렇다.
@CreationTimestamp & @UpdateTimestamp
- hibernate.annotation 패키지 (JPA 실행)
- DB로 넘어갈때 자동 입력
- milliseconds (%sss) 까지 들어감
@CreatedDate & @LastModifiedDate
- springframework.data.annotation 패키지 (Spring 실행)
- Spring Auditing 기술
- 객체 생성,수정과 함께 자동 입력
- microseconds (%ssssss) 까지 들어감
- 사용시 활성화 및 설정 필요함
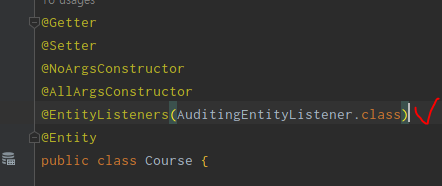
여기서 Auditing 설정이란 CourseApplication와 Course에서


JpaAuditing 활성화해주는 것을 말한다.
같은 역할을 하는 두 어노테이션 사이에서 골라서 사용하면 될 것 같다.
코드
GitHub - recordbuffer/TIL: Today I Learned
Today I Learned. Contribute to recordbuffer/TIL development by creating an account on GitHub.
github.com
'JAVA > JPA' 카테고리의 다른 글
| [JPA] ManyToOne, OneToMany 연관관계 (mappedby / fetchType) (0) | 2022.10.18 |
|---|---|
| [JPA] OneToOne 연관관계 (mappedby / fetchType) (0) | 2022.10.14 |
| [JPA] 영속성 관리 (Entity Manager / Persistence Context / 엔티티 생명주기) (2) | 2022.09.29 |
| JDBC VS JPA (JPA 입문 / Spring Data JPA) (0) | 2022.09.26 |
| [JPA] JAVA ORM JPA (JPA개념 / JPA 입문 / 스프링부트 / JPA 책 추천 ) (0) | 2021.07.25 |


댓글